
Here I want to share two Apple Shortcuts that I created for myself and use to process images for this blog:
and
About a year ago, I posted the blog about the Automator quick action to optimize PNG and JPEG images with TinyPNG service and save the processed images next to the original ones.
While that Automator-based solution still works, macOS Monterey now supports Shortcuts — a new automating tool that seems to substitute the old fellow Automator.
So I decided to create a couple of automation with Shortcuts: one for image optimization (reduce file size but not the size in pixels), and one for image scaling (change its size in pixels).
I have used them for several months to prepare images for this blog, and I really like how they work!
Image Optimization with Monterey Shortcuts
This Shortcut replicates the functionality of the Automator quick action and also uses TinyPNG service as a back-end. There are tons of other similar services, but I like TinyPNG for its simplicity: it just does one thing, and it does it well.
So first, you need to get yourself an API key for TinyPNG.
The simplest way to reuse my Shortcut is to import it from iCloud using the following URL:
➡️ Click here to import the Image Optimization Shortcut ⬅️
The import will work only when the link is opened in Safari.
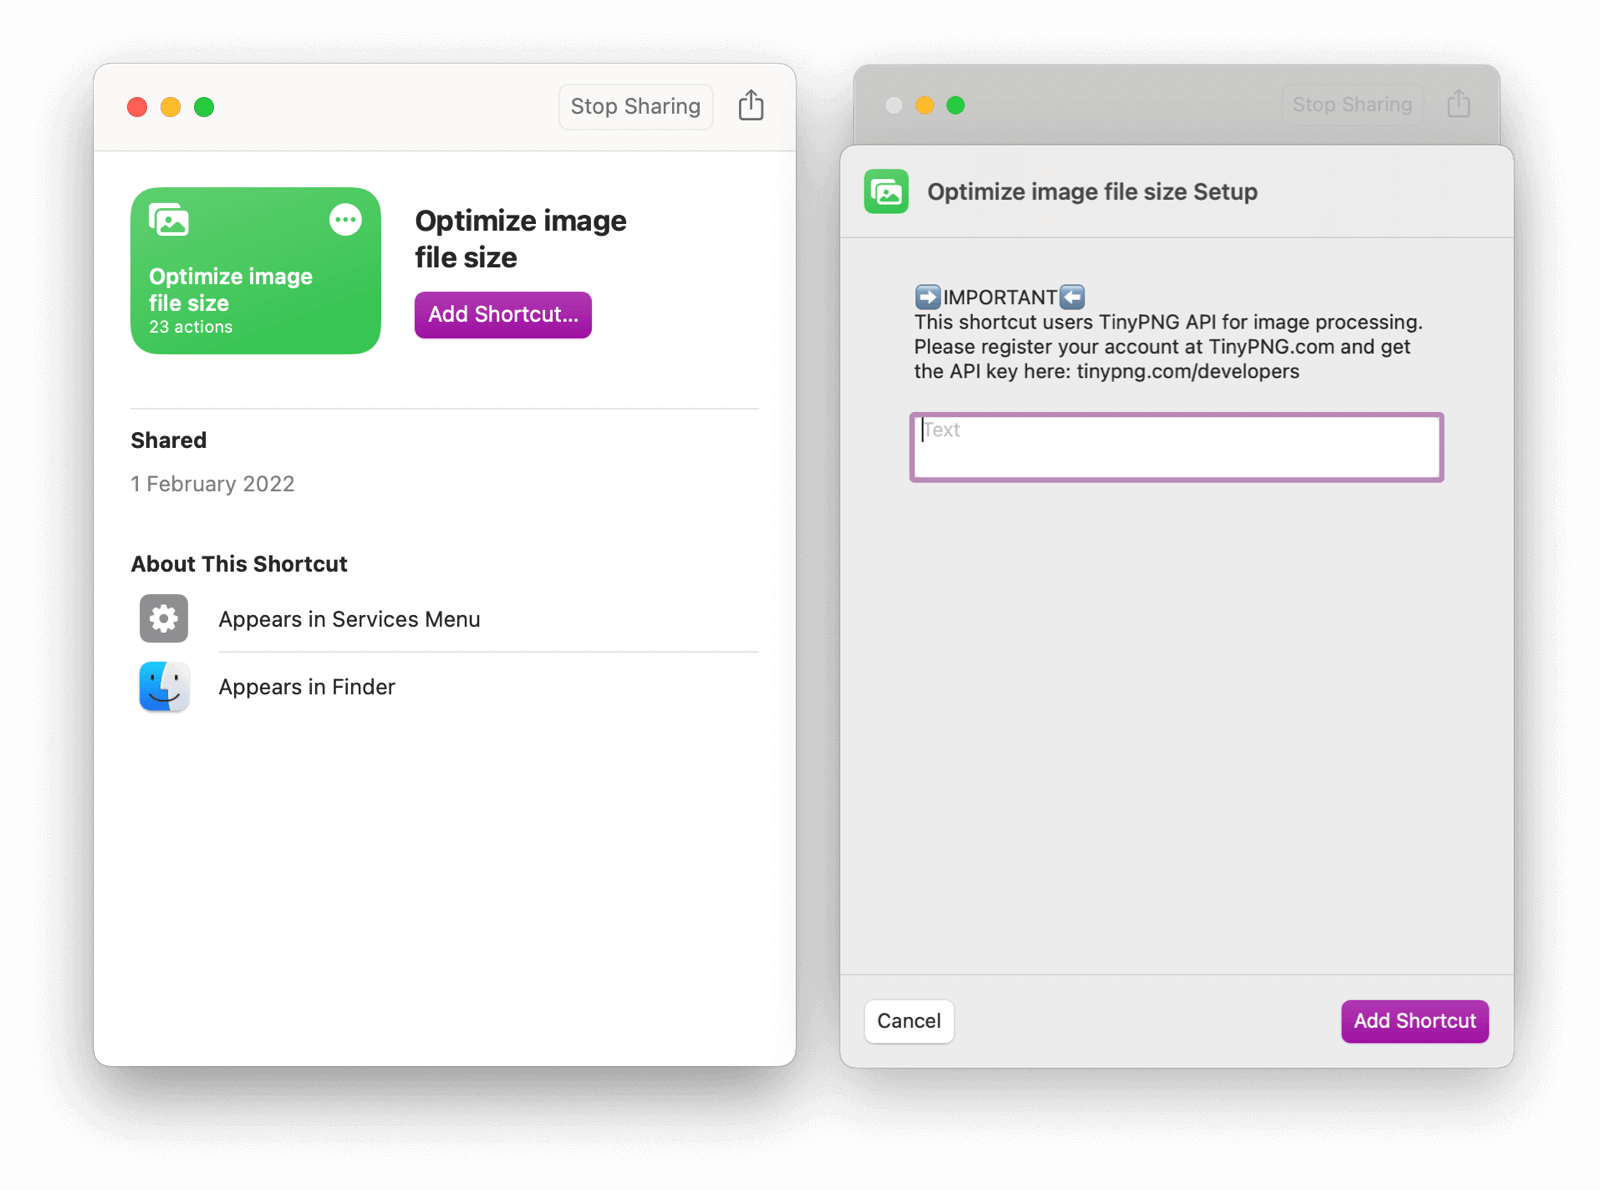
Shortcut Import Dialog
To make the Shortcut work from the context menu of the Finder, set the options on the Details panel of the Shortcut setting as displayed on the screenshot:
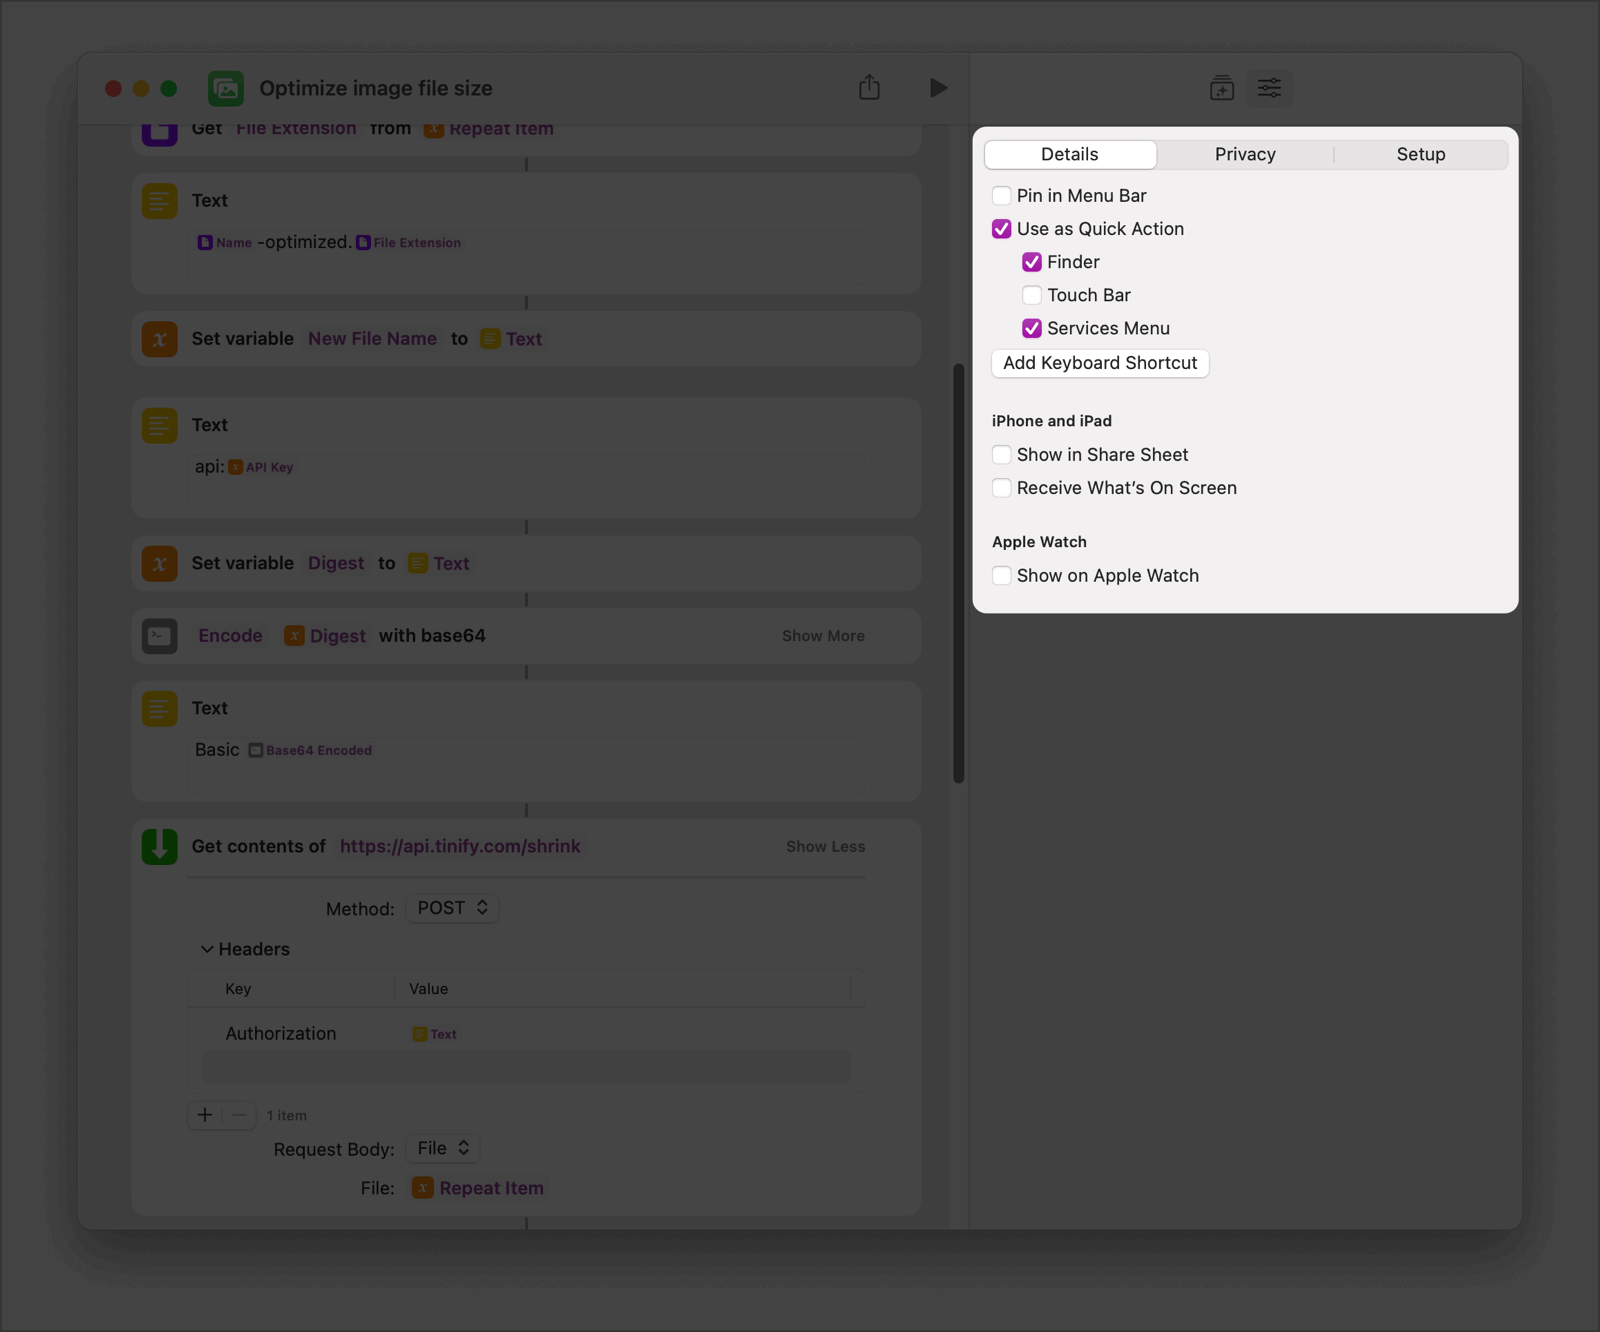
Shortcut Settings
Here is what this Image Optimization Shortcut does:
The Shortcut receives image files. Then, for every image file received, the Shotcut does the following:
- Gets the file’s name and parent directory
- Sends the original file to TinyPNG
- Process the response with URL to download the optimized image
- Downloads the optimized image using the URL from the response and replaces the original image with the optimized
And here is how this Shortcuts looks if you want to create it from scratch:
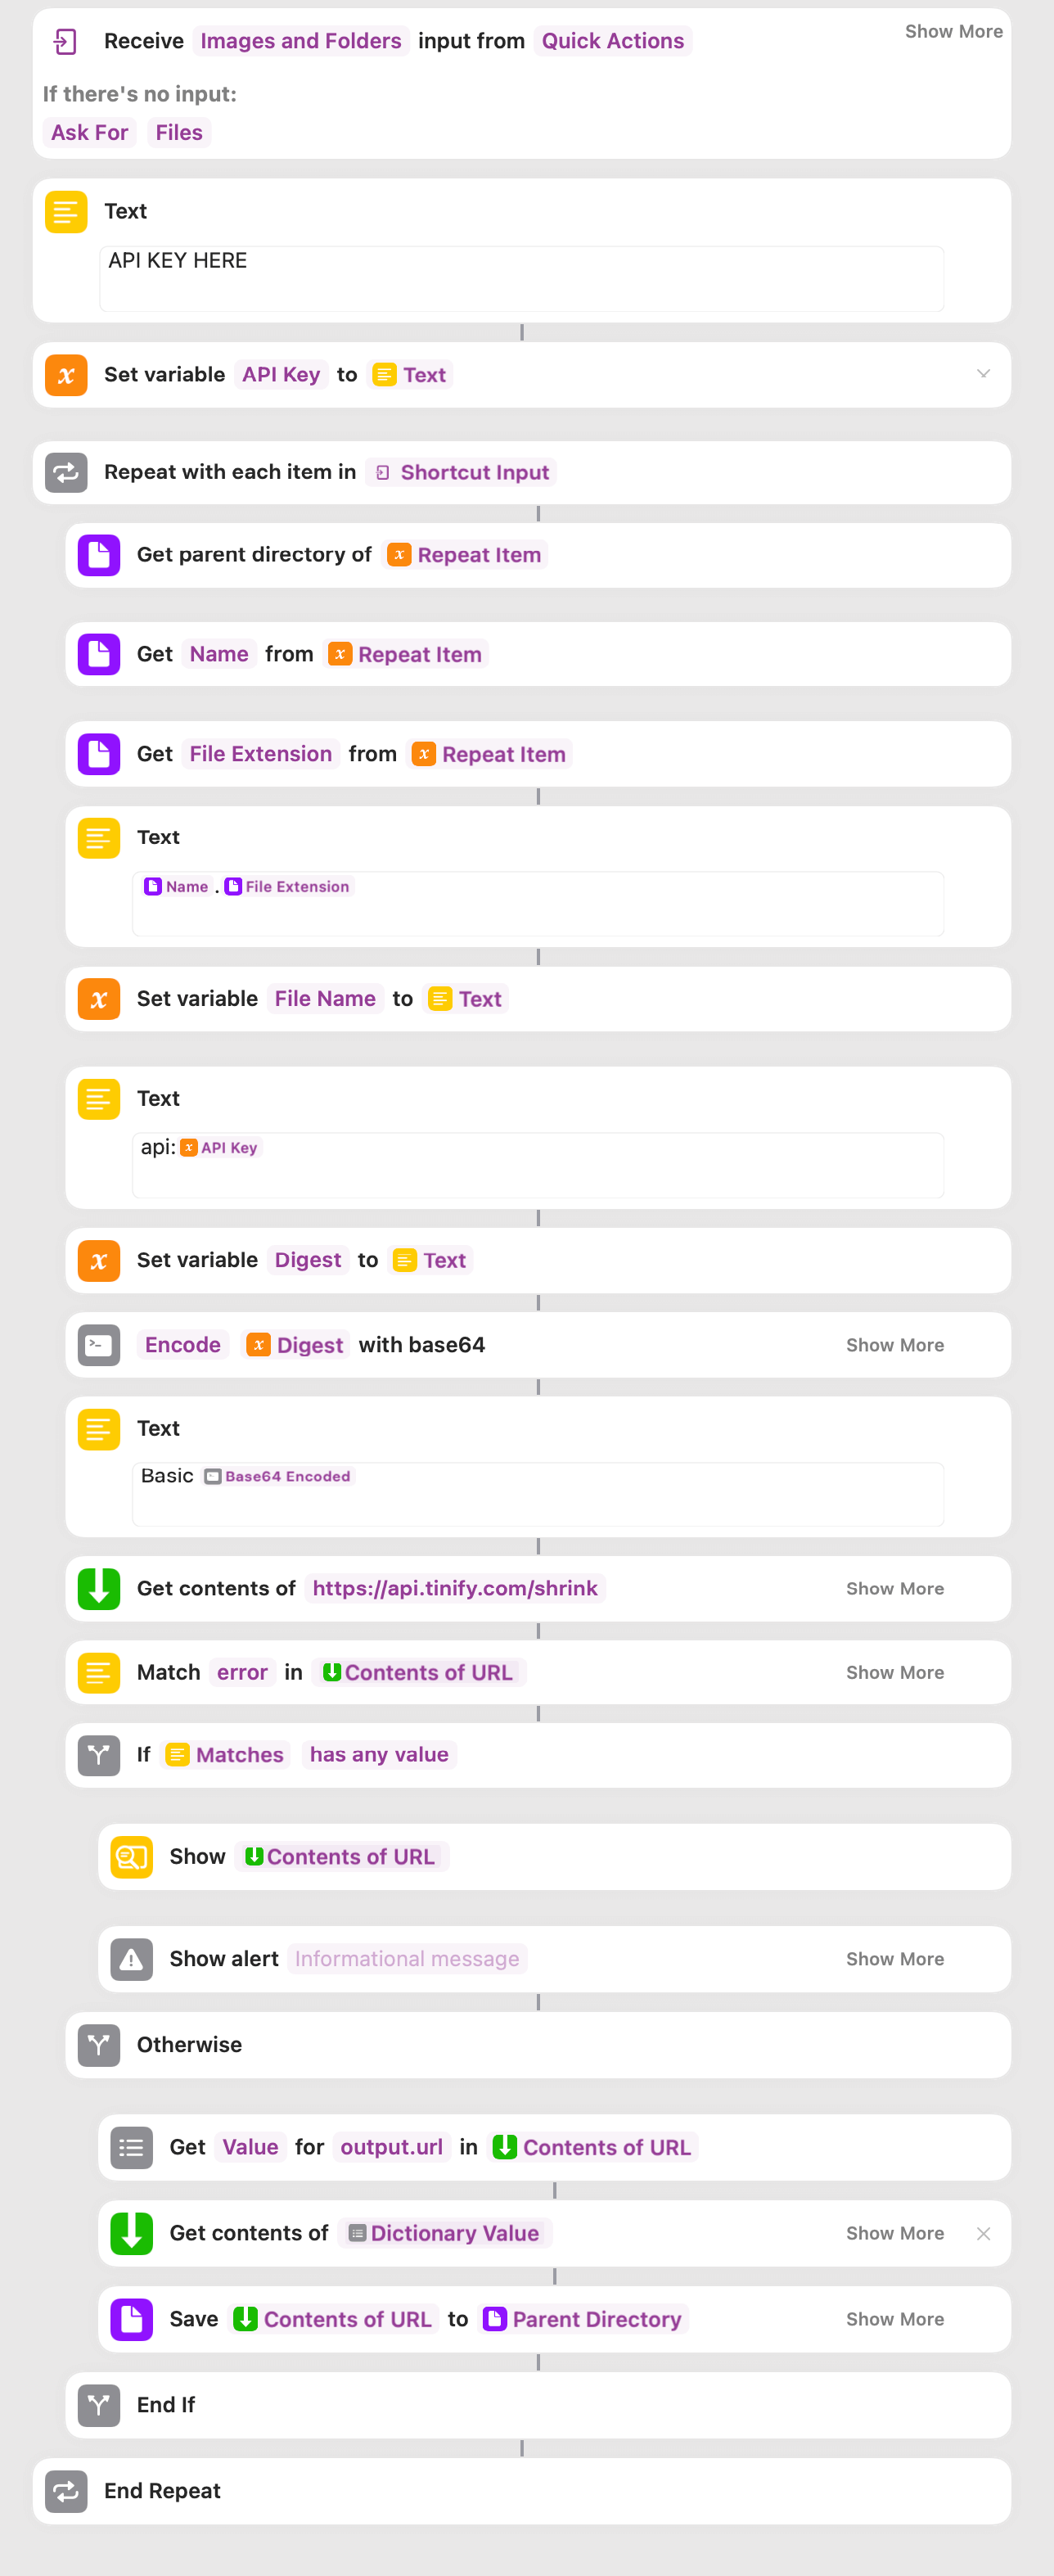
Image Optimization Shortcut
Unfortunately, this Shortcut won’t work on iOS or watchOS because they do not support the “File Storage” actions used in the Shortcut.
🌟 Demo 🌟 Shortcut Demo
Image Resize with Monterey Shortcuts
Another Shortcut I actively use is the image resizer. Most of the images on my blog are 1600px width fitted into an 800px frame to look sharp on the high-res displays (e.g., Retina).
And when I have many images in my folder, I want to make them all be 1600px width at once or don’t change their own size if they were created smaller intentionally (no upscale, in other words).
Here is the link to Shortcut import (again, the import will work only when the link is opened in Safari):
➡️ Click here to import the Image Resize Shortcut ⬅️
Here is how the Image Resize Shortcut looks if you want to create it from scratch:
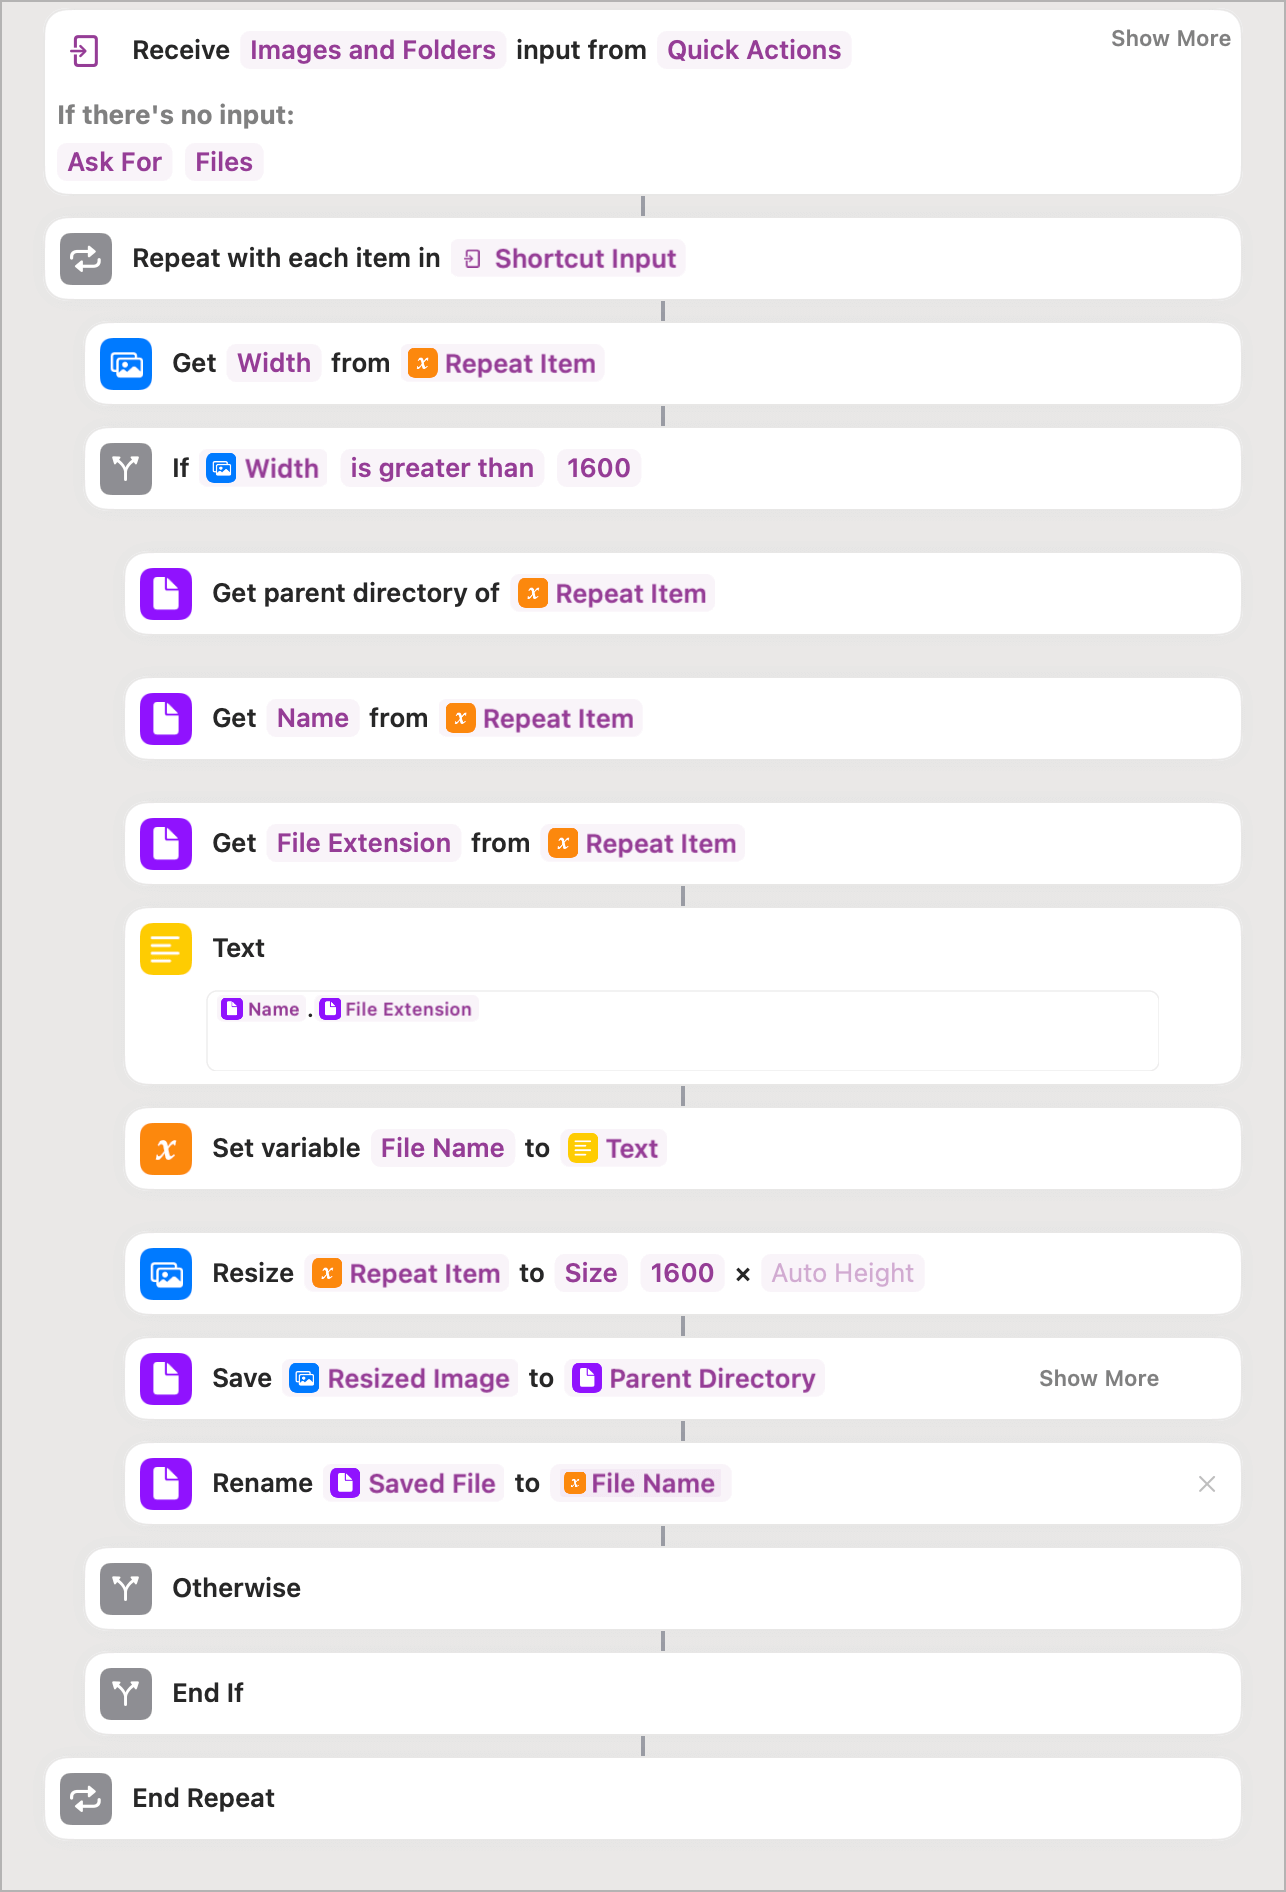
Image Resizing Shortcut
Fun with Shortcuts
I love the way Apple works on routine automation. This Shortcuts app, ported from iOS, brings a lot of cool and fun possibilities to Mac.
Do you use Shortcuts? What is your favorite? I would love to know!